How to Extend a Concrete Slab
Extending a concrete slab is an integral component of any building. Extending one can give rise to many renovation projects such as adding floors, walls, columns, beams roofs windows etc.
To extend a concrete slab, it is essential to plan the project, mark the area with spray paint or string lines, excavate and excavate again for extension, build a frame with support elements for support rebar installation, then pour new concrete slab.
Plan Out Your Slab Extension Area
Concreting Melbourne slabs are essential components of any structure, serving as the basis that supports columns, walls, roofs, windows and utilities. A renovation that includes expanding an existing slab represents a major change to your house; for this type of job it’s wise to consult professionals to ensure it runs smoothly.
Start by planning out the extension area. Use landscaping paint to mark its perimeter, making sure that its lines are even. Next, excavate within these markings until soil depth reaches nine inches below existing patio level.
To minimize cracking risks when designing your slab’s layout, incorporate control joints. Control joints are intentional weak points in concrete that allow it to crack when it settles rather than creating large areas of deformation.
Build a Frame
Once you have established the dimensions of your slab extension area, it is time to build its frame. Begin by spreading out gravel along its perimeter before lining it with 2×6-foot lumber and nailing them together to form a sturdy concrete form. When pouring concrete onto your form, wooden stakes may help secure its placement if necessary.
As you build a concrete form, be sure to include rebar in the concrete mix to add strength. Also establish a sloped drainage system using a level for maximum effectiveness.
Ready-mix concrete can be purchased from local concrete providers or mixed yourself using a wheelbarrow. When handling wet concrete, always wear protective glasses and gloves for safety purposes.
Excavate the Expansion Area
Concrete slabs are an important structural element in buildings. Unfortunately, without adequate support they can crack under stress and develop cracks over time.
Rebar or steel mesh should be added to your concrete slab extension area in order to minimize large cracks, add strength to it, and lessen tensional or torsional loads from cracking the concrete. Doing this can prevent large fractures.
Once your concrete slab extensions are complete, it’s important to install base material in the excavation site. Use a mix composed of crushed stone and/or sand (commonly referred to in the Northeast as gravel); these materials offer varied aggregate sizes that compact well for compacting purposes.
Once the base is laid down, it should be leveled using a bull float and rounded over using an edging trowel before being tamped down and watered to ensure proper setting up.
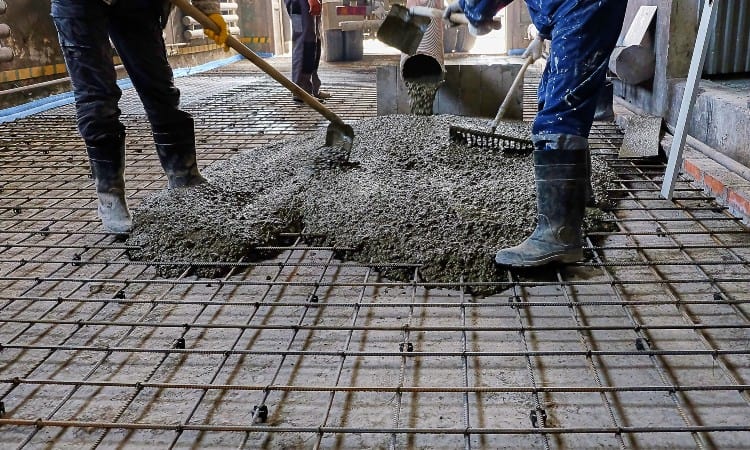
Pour the Concrete
An integral component of any building, concrete slabs can be extended to create more space within structures. Extending them involves more extensive renovation work than other renovation methods due to needing walls, columns, beams roofs and windows as well as installing finishes and utilities – but when extended properly can add valuable extra square footage.
Once your frame is complete, it’s time to pour concrete. Since concrete hardens in only 28 days, working quickly is key; if needed, divide up your slab into sections and pour each section on different days if necessary.
Before pouring, tamp the ground with a hand tamp to compact it and prevent cracking once the concrete has set. Also make sure to look out for pipes or roots that could interfere with your new slab.
Finish the Slab
As concrete settles, it will expel bleed water to the surface. Wait until this wet sheen has dissipated and thumbprint hard concrete has formed before proceeding with finishing work. Never finish concrete while there is still bleed water present as this increases weak points within its composition and could eventually lead to cracking later.
Use a magnesium (mag) float to smooth the surface of your slab and eliminate any rough patches caused by bull floating, edging or control jointing. This will even out any rough spots left from these processes.
Install control joints by cutting grooves into the slab with a hand-held groover tool. For an average 4 inch thick slab, this should be done every 2-4 feet to reduce uncontrolled cracking and extend its useful life.